前言
JS 30 是由加拿大的全端工程師 Wes Bos 免費提供的 JavaScript 簡單應用課程,課程主打 No Frameworks、No Compilers、No Libraries、No Boilerplate 在30天的30部教學影片裡,建立30個JavaScript的有趣小東西。
另外,Wes Bos 也很無私地在 Github 上公開了所有 JS 30 課程的程式碼,有興趣的話可以去 fork 或下載。
本日目標
今天我們要實作的內容是當使用者hover in 或 out 導覽列時,展開顯示下方的連結、文字內容並搭配上 CSS 的動畫效果。

解析程式碼
HTML 部分
<h2></h2>用來模擬<nav></nav>不是 HTML 最上面元素的情況。
<nav></nav>(.top)是我們的導覽列,其中包含作項目內容背景用途的<div></dvi>(.dropDownBackground),以及項目列表<ul></ul>(.cool)和項目內容<li></li>,其中每一個項目的內容除了<a></a>標題連結有顯示外,剩餘資訊.dropdown的部分都被預設隱藏。
1 | <h2>Cool</h2> |
CSS 部分
-
.dropdown: 分別設定opacity: 0;、display: none;預設隱藏.dropdown,然後用transition監控 CSS 屬性值的變化,達成 CSS 動畫的效果。 -
.trigger-enter .dropdown:.trigger-enter這個 class 會在 hover in 任意一個<li></li>時,被加到.dropdown上。設定display:block;把隱藏的項目資訊 show 出來,但現在還是透明的。 -
.trigger-enter-active .dropdown:.trigger-enter-active這個 class 會在 hover in 任意一個<li></li>時,被加到.dropdown上。設定opacity:1;把隱藏的項目資訊 show 出來,現在是不透明的。
為什麼要把opacity、display分開寫而不寫在同一個 class 選擇器呢? 因為寫在一起的話,transition的動畫效果會失效。
1 | .dropdown { |
-
.dropdownBackground: 初始項目內容的背景被隱藏(透明)。 -
.dropdownBackground.open: 讓項目內容的背景被顯示出來(不透明)。而.open這個 class 會在 hover in 任意一個<li></li>時,被加到.dropdownBackground上。
1 | .dropdownBackground { |
JS 部分
首先取得所有必要的網頁元素,包括項目列表下的每個<li>、作為列表項目內容背景的.dropdownBackground以及導覽列.top。
1 | const triggers = document.querySelectorAll('.cool > li'); |
為項目列表中的每個<li>都分別註冊mouseenter event listener(hover in 觸發)和mouseleave event listener(hover out 觸發),然後各自以handleEnter()和handleLeave作事件處理。
1 | //listen for hovering in and out |
hover in <li>時,將trigger-enter加到<li>上。
然後利用setTimeout()讓在<li>加上trigger-enter-active這件事被延遲150毫秒,利用條件判斷只有當<li>上已經有.trigger-enter這個 class,才執行後方的在<li>加上.trigger-enter-active,會需要做到這樣是為避免使用者 hover in and out 的時間過快,讓一個項目的內容還沒來得及消失,另一個卻馬上出現,造成殘影的效果。
最後,在項目內容背景加上.open這個 class 讓它被 show 出來。
1 | function handleEnter(){ |
handleLeave()要做的事情很簡單,就是當使用者 hover out 時,移除所有被新增的 class。
1 | function handleLeave(){ |
最後的最後,我們要把項目內容的背景移到它該待的地方。
首先取得項目內容的元素然後再取得項目內容相對視窗右上角的座標(這個座標不隨著 scroll down 而有所改變)。
複習一下getBoundingClientRect()取得的元素座標圖 :
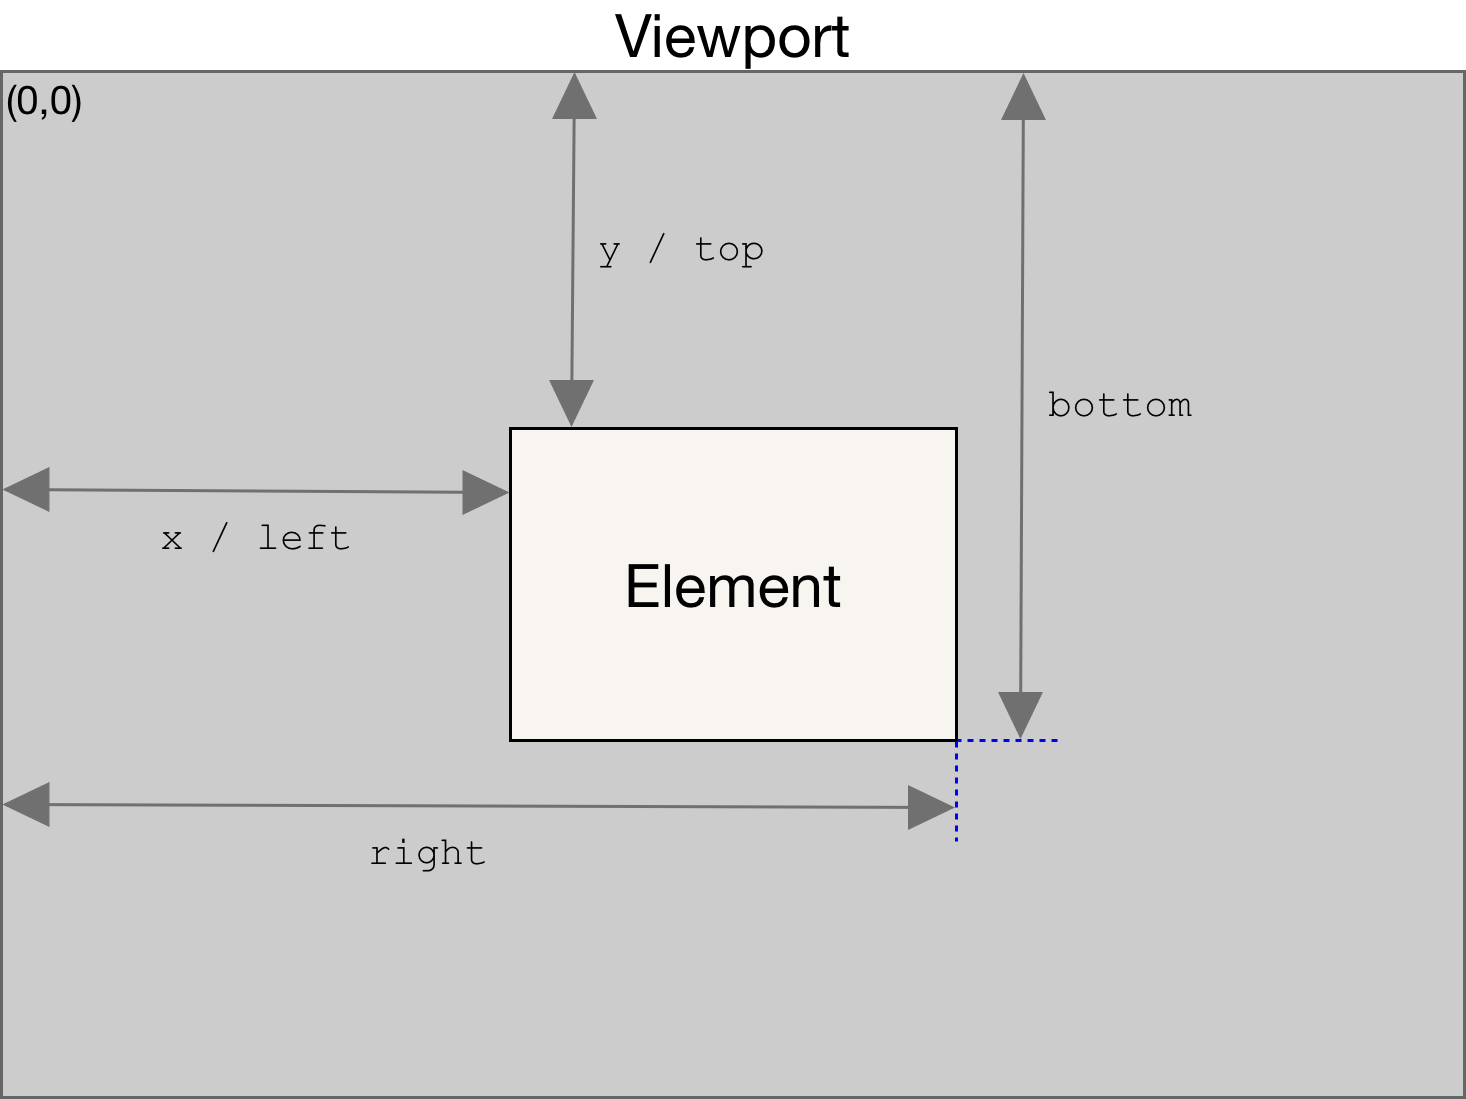
那為什麼我們還需要取得導覽列nav的座標呢? 因為在 nav 不是 HTML 文件裡的第一個元素時,如果只單單用.dropdown的left、top進行項目內容背景的位置設定,會發現到背景被稍微往下擠了一點,被往下擠的大小剛好可以用導覽列nav的位置來作修正,分別將指定的left、top減去nav的left、top就好。
我們將大小、位置等等資訊整合在物件coords裡,之後再個別利用coords裡的指定值去修改項目內容背景的 CSS 屬性就完成了。
1 | function handleEnter(){ |
補充資料 :
mouseenter
mouseleave
Element.getBoundingClientRect()
CSSStyleDeclaration.setProperty()